Properly installed gutters are essential for protecting your home from water damage, directing rainwater away from your foundation, and maintaining its structural integrity. Whether you’re replacing old gutters or installing a new system, this comprehensive guide will walk you through the process step-by-step. Don’t worry; it’s easier than you might think—you just need the right tools and a bit of patience.
Why Gutters Are Important
Before diving into the Gutter installation process, let’s understand why gutters matter. Rainwater, if not channeled properly, can lead to erosion around your home’s foundation, flooding in basements or crawl spaces, damage to siding and landscaping, and rotting fascia and soffits. A good gutter system protects against these issues and increases your home’s lifespan.
Tools and Materials Needed
To begin, gather everything you’ll need. Essential tools include a measuring tape, level, hacksaw, cordless drill, caulking gun, and a sturdy ladder. Safety glasses and gloves are also recommended. You’ll also require materials such as gutters made of aluminum, vinyl, or steel, downspouts, gutter hangers, screws, sealant, and connectors. Having these items on hand will make the installation process smoother.
Step-by-Step Guide to Installing Gutters
Step 1: Measure and Plan
Start by measuring the length of your roofline to determine how much gutter material you’ll need. Plan where to place the downspouts and draw a rough diagram to guide you. Be sure to account for a slope of about ¼ inch for every 10 feet to allow water to flow toward the downspouts effectively.
Step 2: Remove Old Gutters (If Necessary)
If you’re replacing existing gutters, carefully remove them by unscrewing or prying off the brackets. Take care not to damage the fascia or soffit boards in the process. This step is crucial for ensuring the new installation goes smoothly.
Step 3: Mark the Slope
Use a chalk line to mark the slope along the fascia board. Begin at the highest point near the middle of the roofline and slope downward toward the location of the downspout. This step ensures proper water drainage.
Step 4: Install Gutter Hangers
Attach the gutter hangers along the chalk line, spacing them evenly for adequate support. Secure them firmly to the fascia board, checking their alignment to maintain the correct slope. Proper placement of hangers is critical for the stability of your gutters.
Step 5: Cut and Join Gutters
Cut the gutters to the desired lengths using a hacksaw. For corners, use pre-mitered pieces or cut angles as needed. Join the sections together with connectors and apply gutter sealant to seal the seams, preventing leaks. Precision in this step ensures a watertight system.
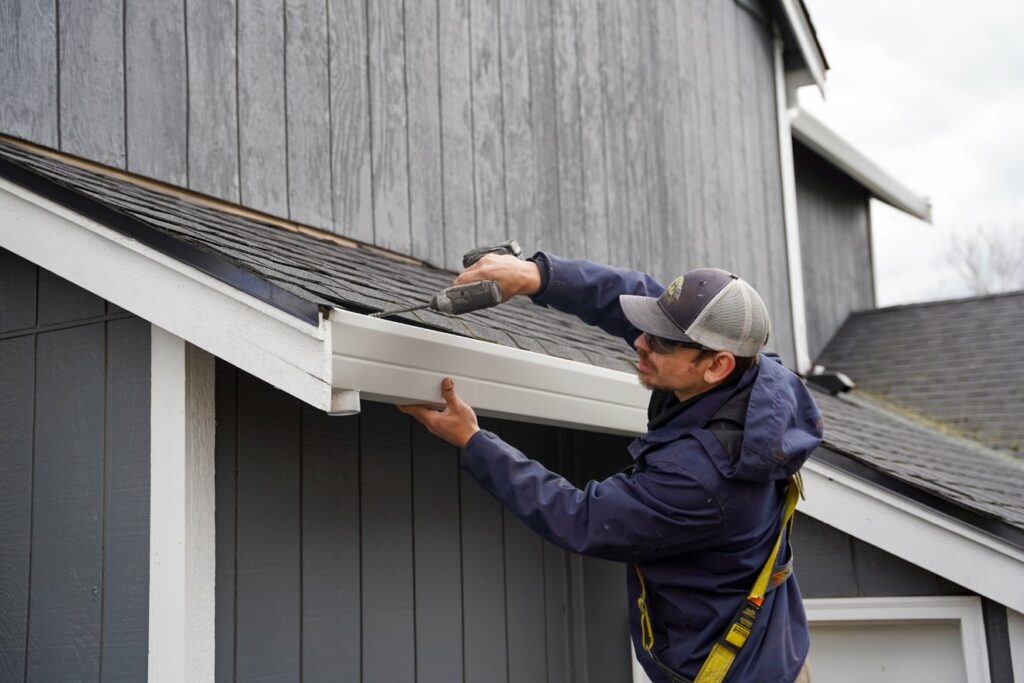
Step 6: Attach Gutters to Hangers
Secure the gutters into the installed hangers, ensuring they follow the slope you marked earlier. Double-check the alignment and make any necessary adjustments. This step sets the foundation for a functional and reliable gutter system.
Step 7: Install Downspouts
Connect elbows to the gutter outlets and attach the downspouts. Secure the downspouts to the house with brackets, spacing them appropriately for stability. Ensure the water is directed away from the foundation to prevent pooling and potential damage.
Step 8: Test the System
Run water through the gutters using a hose to test the system. Check for leaks, clogs, or improper flow. Make adjustments as needed to ensure everything functions smoothly. Testing is essential for identifying and fixing any issues before they escalate.
Common Mistakes to Avoid
One common mistake is skipping the slope measurement, which can cause water to pool in the gutters, leading to overflow or sagging. Using inadequate fasteners can also compromise the stability of the system, so invest in durable materials. Lastly, ignoring safety precautions when working on a ladder can be dangerous, so always prioritize your safety and have someone assist you when needed.
Gutter Maintenance Tips
To keep your gutters in top shape, clean them at least twice a year, ideally in the spring and fall. Installing gutter guards can help minimize debris accumulation. Regular inspections for leaks, sagging, or loose hangers will also extend the life of your gutters and maintain their efficiency.
When to Call a Professional
While installing or replacing gutters can be a DIY project, there are situations where professional help is necessary. Complex rooflines, multi-story homes, or damaged fascia boards may require expertise. Additionally, if you’re short on time or resources, hiring a professional ensures proper alignment and durability, giving you peace of mind.
Final Thoughts
Installing or replacing gutters is a manageable task that can save you money and protect your home from water damage. By following this guide, you’ll have a durable gutter system in no time. Just remember to plan carefully, take your time, and always prioritize safety. Your home (and wallet) will thank you!